Showing posts with label baking. Show all posts

Sunday, November 3, 2013

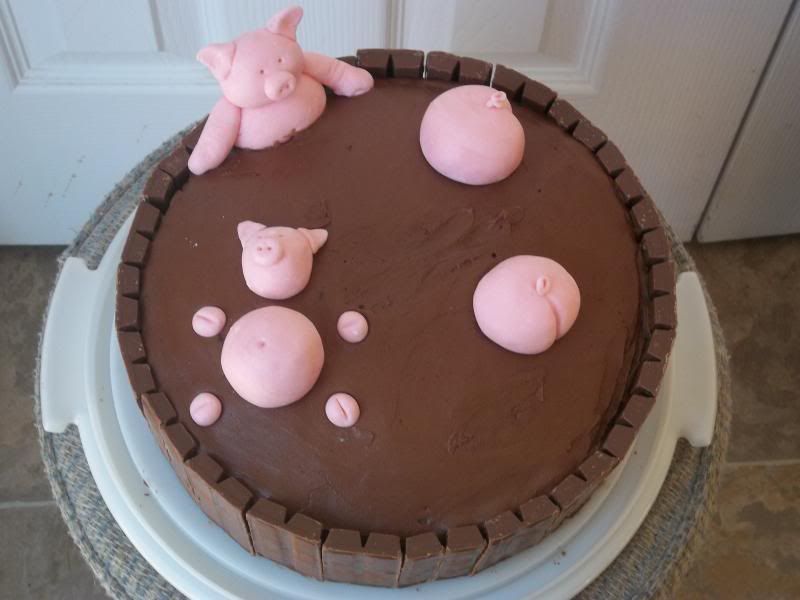
Pigs in Mud

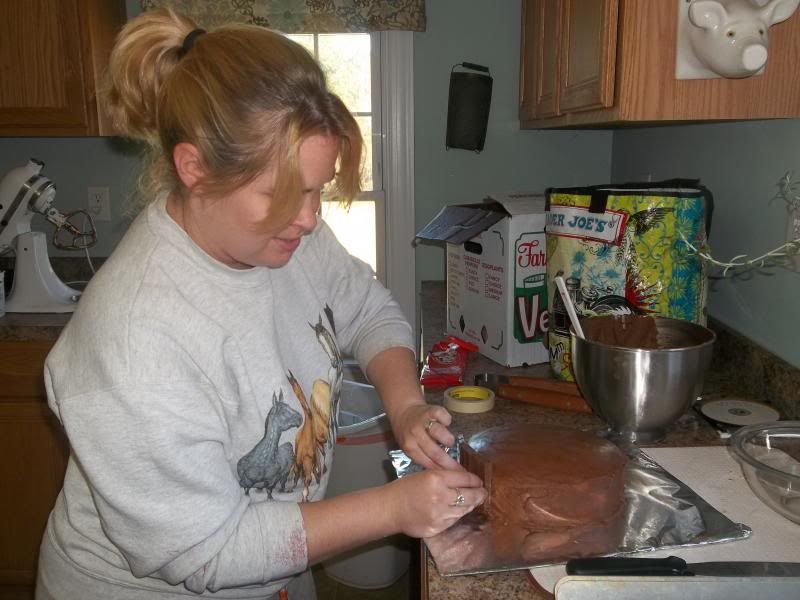
My friend Lindsay and her husband just moved back to Maryland from Minnesota. She was finishing vet school, and just graduated.  I'm really glad she's back in Maryland now, so we can see each other more often.  She came over this weekend, and we decided to do a little baking.  She sent me a picture of this cake, and we decided to make it when she came over. 


We baked regular 2 layer round cakes and frosted them with chocolate buttercream frosting.  The original cake used chocolate ganache, but we didn't have any heavy cream.

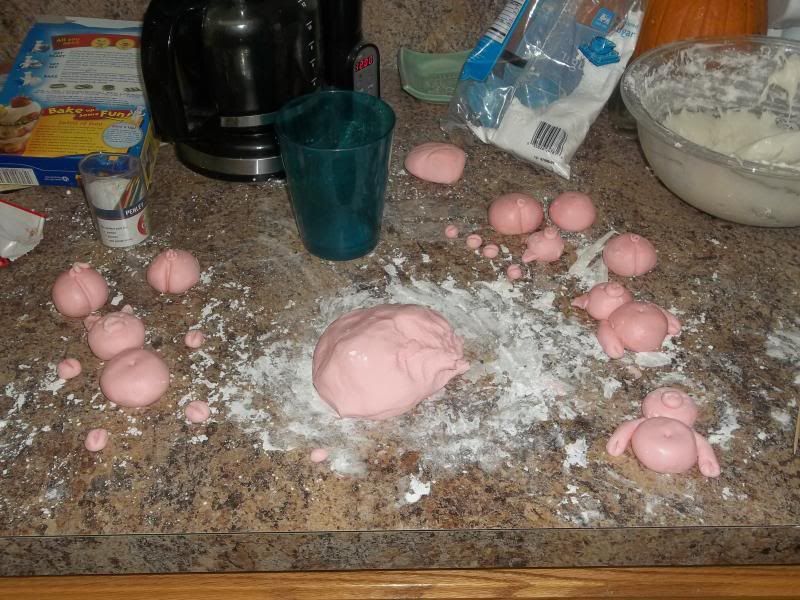
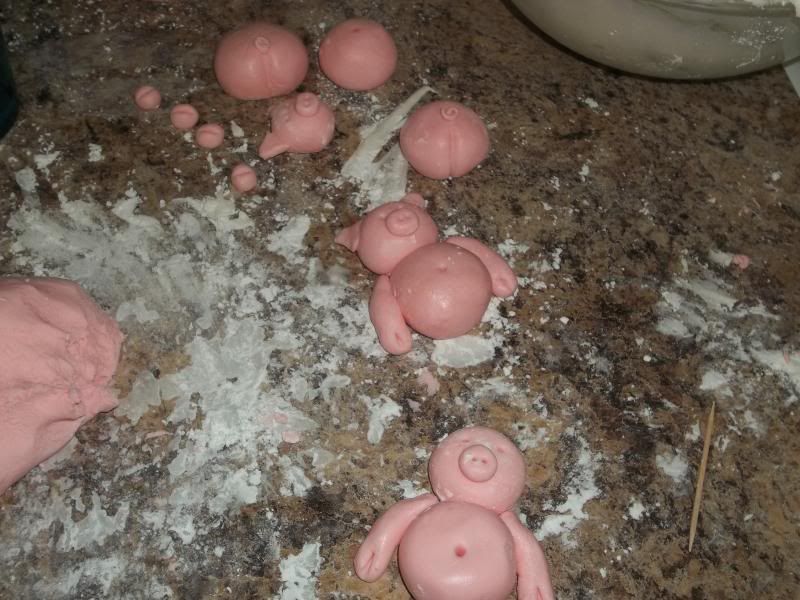
We made marshmallow fondant for the little piggies, and I used this recipe.  It was easy to make, but we had to scale the recipe WAY back. A little red food coloring made the perfect pink color.


The fence is made of Kit Kats, so that's an easy one. 


I love how they turned out!


Thursday, March 1, 2012

Shaker Lemon Pie

I bought a bag of Meyer lemons last week. Partly because they were packaged in a cute little bag (sucker!) and partly because I'd heard of a pie that used the whole lemon, rind and all.

It's called the Shaker lime pie. Apparently the Shakers did not want to waste any of the precious lemons, so they made the pie with the whole thing (minus the seeds). The lemons get sliced very thinly, then mixed with a generous amount of suger, some eggs, and vanilla. I was excited to try it!


I added the ingredients...


...and made the pie with my interpretation of a lemon branch.


It looked so good and I could not wait to try it!


The result? Eh. David hates it. I think it's just ok. The lemons were SO tart and bitter. Maybe I didn't slice them thinly enough. Also, most recipes I've seen call for 2 lemons and 2 cups of sugar. The recipe I used called for 3-4 lemons (I used 4) and 2 cups of sugar.


So since the crust is delicious, and the lemon curd itself is good, I've been eating it and just removing the lemon slices. I wish I had peeled the lemons first, because I think I could handle that.


Here's the recipe for the crust (but I did use my food processor to make it). The crust and the curd is really good a little vanilla ice cream on top!

Tuesday, January 10, 2012

German Pancakes

I love breakfast foods. Love them. One of my favorite things to eat is French toast. Yum. I was looking for something new to try, and came upon a recipe for German pancakes. I thought they looked interesting, so I gave it a try and I have to say they're great! It's sort of a cross between French toast and regular pancakes.

This is a super easy recipe, and after I'd made it once the recipe I had it locked in my brain forever memorized.


It puffs up a good bit while baking, but it'll collapse while it cools. We ate ours with a sprinkle of powdered sugar and some maple syrup.


German Pancake Recipe
Preheat oven to 400* F

1/4 cup butter
1 cup milk
4 eggs
1 tsp vanilla
1 cup flour
2 Tbsp sugar
pinch of salt

1. Place butter in an 8" cast iron skillet and place in the oven to heat pan and melt butter.
2. Combine milk, eggs, and vanilla in bowl and mix well.
3. Add flour, sugar, and salt and mix until smooth.
4. Remove cast iron pan from the oven (it's HOT! Even the handle!) and pour in batter.
5. Bake for ~18 minutes until browned and puffy.

Then you can wait for it to collapse/cool a tad and serve with syrup, powdered sugar, etc.

Wednesday, August 24, 2011

Red Velvet


David's coworker sharpened a pair of sheep hand shears for me a few weeks ago, and David told him I would bake him something as payment. His request was red velvet cake. I'd never made (or eaten) red velvet cake before, so I went searching for recipes.

I check Bakerella's blog now and then, and I remembered she did a red velvet cake before. I decided to make cupcakes instead of a cake, since I wanted to be able to taste it and I didn't want to send in a cake with a piece missing. The cake part turned out really well. It was very moist and when we ate some after they cooled they had a nice crunchy top. The cream cheese icing was my favorite part. I didn't use the icing recipe on Bakerella, I used one out of my Good Housekeeping cook book. I believe it was 2 packages of cream cheese, 2 tablespoons of milk, a pinch of salt, and a pound of confectioner's sugar.

You want to know the funny part? David brought them to work on Monday and then found out his coworker had taken the whole week off! His other coworkers polished them off though. :)


Sunday, January 30, 2011

Homemade Cake Donuts


Ingredients
  • 2.5-3 cups all-purpose flour
  • 1/2 cup white sugar
  • 1 teaspoon salt
  • 1 tablespoon baking powder
  • 1/2 teaspoon ground cinnamon
  • 1/4 teaspoon ground nutmeg
  • 2 tablespoons melted butter
  • 1/2 cup milk
  • 1 egg, beaten
Directions
Sift together 2.5 cups of flour, sugar, salt, baking powder, cinnamon, and nutmeg. Add in the melted butter and mix until crumbly. Stir in milk and egg until smooth. Add remaining flour if needed until dough is slightly sticky but able to be kneaded. Knead lightly on well floured surface. Roll out dough to 1/2" thick. Use donut cutter or 2 biscuit cutters to cut into donut shape. Fry in 375* oil, flipping once, until golden brown. Drain on paper towels. Serve plain, or roll in cinnamon-sugar or powdered sugar.


These donuts were very easy to make! I ended up making twisted donuts and donut holes along with the regular round shaped donuts.

Sunday, December 19, 2010

Annual Cookie Day

Three years ago I invited a few of my girlfriends over to bake cookies and watch cheesy Christmas movies. We had a great time and I decided it would be fun to do it every year! Well, last year it snowed a bit which then turned into about 2 feet of snow so needless to say Cookie Day was cancelled last year!

Luckily this year it did not snow, so all the gals made it.


We had lots of food...


And we all made different kinds of cookies!


We had peanutbutter blossoms, brownie cookies, butterscotch oatmeal...


Italian wedding cookies (I think that's what they are)


And Christmas Cherries. I made those, so that's the only recipe I can post or link to. :-)


I have to say I was very skeptical about the green cherries. They're just odd. I tasted one right out of the container and hated them. Luckily, once they baked in the cookies they were much better. I'll probably make these again just because they're cute and colorful.

After the baking was over we divided the cookies between us so we each got several different kinds. We had a great time!

Sunday, September 12, 2010

Tuesday, December 15, 2009

Preg Checks and Cookies

Those two things don't really go together, do they?

Let's start out with the pregnancy checks! I borrowed my friend's Draminski Pregnancy Detector so I could check the sheep, Darla and Purl.

The detector is pretty neat, and if I had more than two sheep I'd have to save up money to buy my own. It's a little, portable ultra sound that detects the presence of amniotic fluid in the uterus. Sometimes it can read full bladders, but usually it's pretty accurate. Plus, I've found that normally sheep squat to urinate when you catch them (because they're stressed), so their bladders usually aren't too full. The meter recommends testing between 75-90 days bred. If you check too early there might not be enough amniotic fluid to cause a signal, and if you wait too late, the lamb(s) are too big and you can't get a signal from the fluid.

The detector itself looks very simple. It has one button (the on/off). You can't mess that up! You can see June had to inspect it first.


Then there's the probe. The probe needs some type of lubricant to ensure good contact with the skin of the animal.


You can use vegetable oil or KY jelly or lotion. This is what Lindsay sent with the detector.


I made a little video while I checked Purl. PLEASE ignore what I'm saying in the video. I was flustered and trying to check her and film at the same time. I say a few things that are incorrect. The main thing- I always check on the RIGHT side of the animal, not the left. First you turn on the probe, then you put the lotion or oil on the probe. It will beep about once per second. You put the probe on the right flank, in the area where there's little or no wool. You then point the probe up toward the spine and slightly forward. Usually you can get a signal within a few minutes, but once you get used to it you can get one in a second or two. If the ewe is pregnant, you should hear a rapid beeping. It also helps to have someone hold the sheep to test them. I had to tie Purl to the hay rack and she was a little fidgety. I would have waited until David got home so he could help me, but he gets home after dark and I couldn't wait.

Ok, so now you can watch the video. I recommend you turn off your sound first. ;-)


So Purl is definitely pregnant! I checked Darla after this, but I could not get a pregnant signal. There are 3 possible reasons why:


1. She's not bred.
2. She's too far along to get a signal.
3. She's not far enough along to get a signal.

I'm really hoping it's not #1. I doubt it's #2 because she's not looking very pregnant. I really think it might be #3 because I picked her up November 8th and it's possible she'd just gotten bred. If that's the case, she could possibly be only about 40 or so days bred. I'll try again in a month!

I tried to preg check June, but I'm not sure the meter works on goats (though the website says it can possibly work on goats). She had too much hair and I couldn't even get a signal at all.

Oh, and I tried it on myself. I'm not pregnant. ;-)


On to the cookies! I made more sugar cookies last night because we have work luncheon today!
I had fun with these. I was up late decorating them, but it was fun!

They're almost too cute to eat! Almost.


Sunday, December 13, 2009

Yesterday was cookie making day, since I have a cookie exchange to go to today. Are you familiar with cookie exchanges? Well, if not, I'll tell you about it. My friend has a cookie exchange every year. She invites girl friends over and has a little party, with food and drinks. Each of the attendees brings a certain amount of a certain type of cookie (this year we are supposed to bring 6-7 dozen cookies. After we eat, we do the exchange. All of the cookies get set out and we all get a certain number of each type of cookie! So, today I'll arrive with 7 dozen sugar cookies, but I'll go home with 7 dozen assorted types of cookies, made by all of the other girls. It's great, because I don't have to go through the work of making all those different types of cookies.

I decided to make some sugar cookies, since they're fun and you can ice them. They're very Christmasy to me. I used the recipe out of my 1973 edition Good Housekeeping cookbook (better known as "the red cookbook" or "the big cookbook") that my mom gave me as a gift several years ago. If you don't have that cookbook, you need to get it. It's the go-to cookbook in this house.

I was really excited about rolling out these cookies because the kids were having rest time, and David was out of the house hauling a car for his friend. That meant I had quiet, uninterrupted (well, the kids didn't quite get that concept yesterday) time to bake my cookies! I turned on the Christmas music station on TV and went to town!

First, I rolled out the dough. I like it fairly thin, and I also wanted to stretch the recipe a bit.


I got a new snowflake shaped cookie cutter from Bylers when Becky and I went during her Thanksgiving visit.


I lined the pan with parchment paper, so I didn't have to grease the pan. I just recently (within the last year) starting using parchment paper in the kitchen, and I LOVE it.


All baked. 8.5 dozen cookies. Now for the icing.


I used the decorative icing recipe from the same cookbook. It was simple. 1 1/4 cups confectioners sugar, 1/8 tsp cream of tartar, and an egg white. Mix on high speed until you can run a knife through it and the line stays.

Then I tried to decorate the cookies so they looked something like this, but that quickly flew out the window. That's hard! So instead, I thought it would be pretty to sprinkle some blue sugar on the icing. Only, I didn't have any blue sugar. It's ok, I thought. I'll just mix some blue food coloring in my sugar and mix it up! Well, I didn't have any liquid food coloring, only gel. Oops. So, I put the sugar in the food processor and added some food coloring. This is what I ended up with.


But I like it. It's kinda pretty with the flecks of blue.

So this is what the cookies ended up looking like.


It took a few hours and 2 batches of icing to frost all of them.


But I think they're cute. And I'm excited for the exchange!!


And I have a dozen and a half cookies left over that we can eat at home! Sweet!

Tuesday, September 1, 2009

Feeling Saucy

I had a bunch of tomatoes from the garden that were threatening to go bad, so Sunday I figured it was time to make something with them.

Last year I canned them (halved, not whole), but I decided I should make sauce this time. It would be nice to just open a can and heat it up for dinner.

I started off by blanching the tomatoes so I could peel them easily.

Get a large pot (you can see we're using our crab pot) and fill it with water. Bring it to a boil.


Once the water boils, add some tomatoes and let them stay in the water for 30-60 seconds (as recommended by the Ball Blue Book of Preserving-a must have in any kitchen). I actually only like mine to stay in the water for a maximum of 30 seconds. The longer they stay in, the mushier they get.


When they're ready to come out, immediately put them in COLD water to stop the cooking.


After they cool, they're ready for peeling and coring. I like to de-seed mine too, because I really don't care for the seeds, especially in sauce.

There's a secret to de-seeding them though. Roma tomatoes are usually slightly oval on top. You want to cut it lengthwise so the knife goes through the longer side of the oval. In this picture, I would make the cut horizonally, not vertically.


When you do it right, the seeds are exposed and easy to get out. If you do it the wrong way, it's no big deal, it's just a little harder to get the seeds out without mashing the tomato.


Get the seeds out and cut out the core (stem part) at the top. Go ahead and skin them now. The skin should peel off easily in one piece.


You're left with halves of seed and peel free tomatoes.


Put them in a large pot. Usually they're juicy enough to not add water, but it won't hurt to add just a bit of water to keep them from burning. Turn the heat on low and let them simmer. And simmer. And simmer. Mine simmered for a few hours at least.


Once the tomatoes cook down pretty well, add what you like to make a sauce. I sauteed onions and garlic to add to mine. I also added oregano, Italian seasoning, salt, pepper, and sugar. Sugar keeps it from being too acidic. I should have added mushrooms, but I didn't have any.

Let the sauce simmer for a while until you're happy with it. Unfortunately, mine only made 2 quarts of sauce. If I had made more, I would have canned it. I didn't feel like going through all the hassle for 2 measly quarts.


I also made some zucchini bread. Yum.


And my coworker gave me some new potatoes. Blue ones! I decided I wanted to make homemade chips with them!


I used my new mandolin type slicer. Be sure to always use the guard because these babies are sharp!


Don't those blue potatoes look so neat?


I sliced them thinly and added them to a pot of hot oil. They fried for few minutes. After they're done, just take them out and put them on a plate with paper towels (or brown paper bags) so they can drain some of that oil. And salt them pretty quickly!


Here they are. Some are more crisp than others. They were pretty tasty though!
Related Posts Plugin for WordPress, Blogger...