We all like hot sauce in this family (some more than others), so I wanted to try to make some this year. I feel like it adds up when you buy it in the store, and the bottles are pretty small. I got some peppers from my organic farming friend, and set out in search of a good recipe.
My short attention span sort of got in my way this time. I found a recipe for fermented hot sauce, and "read" through it. It's a lot of text though, and I'd rather see recipes in list form, so I skimmed it. Since I skimmed it, I missed the part where they used wine as the liquid for the fermentation. I used vinegar. Oops. I never really thought much of it.
I put the peppers in vinegar and let them sit on the counter for 2 weeks. I never saw any mold growth, I guess because they were in vinegar (with salt added) and not in wine or a brine like other recipes use.
When I re-read the recipe today, I realized my mistake. I wasn't worried though, I just strained the vinegar and put the peppers in the blender.
Then I dumped that into a pot, along with half the vinegar I strained out, plus a few cloves of garlic and some onion powder. That simmered for about 45 minutes, and reduced by a bit.
Then I added it back to the blender and let it go until it was smooth.
Ta-da! Hot sauce. It made half a gallon plus almost a pint.
It's pretty good too, and should last us a while!
Showing posts with label cooking. Show all posts
Sunday, September 20, 2015
Tuesday, April 28, 2015
Violet Jelly
Every year for 5 years I've picked violet blossoms so I could make violet jelly. Every year I put them in a jar in the fridge, and every year I procrastinated so badly that the flowers would wilt and have to be tossed.
Not this year! The kids and I picked blossoms on Sunday and made jelly on Sunday. Yay! I followed this recipe for jelly. We used about 2.5 cups of blossoms, and poured 2.5 cups of boiling water over them. They sat for a while (probably 10 minutes?) until the water was dark blue.
Kylee took the pictures for this post.
Then we added the lemon juice and watched the liquid turn to a lovely purple color.
Then we added the liquid to the pot, and the packet of pectin. Then we stirred until it boiled, and let it boil for 1 minute.
Lovely pose, Devin.
Once it boiled for 1 minute, we added the sugar, returned it to a boil and let it boil for 1 minute.
Then we ladled it into prepared jars, and processed in a waterbath canner for 10 minutes.
It's very pretty!! And it has a really nice delicate grape flavor.
Not this year! The kids and I picked blossoms on Sunday and made jelly on Sunday. Yay! I followed this recipe for jelly. We used about 2.5 cups of blossoms, and poured 2.5 cups of boiling water over them. They sat for a while (probably 10 minutes?) until the water was dark blue.
Kylee took the pictures for this post.
Then we added the lemon juice and watched the liquid turn to a lovely purple color.
Then we added the liquid to the pot, and the packet of pectin. Then we stirred until it boiled, and let it boil for 1 minute.
Lovely pose, Devin.
Once it boiled for 1 minute, we added the sugar, returned it to a boil and let it boil for 1 minute.
It's very pretty!! And it has a really nice delicate grape flavor.
Wednesday, September 3, 2014
Green Bean Heaven
I love green beans. I don't know that I could ever get sick of eating them. Since I gave up on my own garden shortly into the season, I decided to buy a bushel of beans from our local produce market.

I decided to can most of them, since we're running low on freezer space. We also saved some to eat fresh, and I put a couple of bags in the freezer.
I ended up with 14 quarts of beans, and 4 pints of dilly beans. Have you ever had dilly beans? They're pickled green beans. I hope we like them!
I decided to can most of them, since we're running low on freezer space. We also saved some to eat fresh, and I put a couple of bags in the freezer.
I ended up with 14 quarts of beans, and 4 pints of dilly beans. Have you ever had dilly beans? They're pickled green beans. I hope we like them!
Monday, July 7, 2014
30-Minute Mozzarella
Last year I tried making mozzarella, because I'd read that it's so easy you can do it in 30 minutes. Well, I tried, but for some reason I failed. I'm not sure what happened, but my final product was definitely not mozzarella! I was too intimidated to try again, until recently. I started reading again about how easy it was, and I wanted to try it again. I also have lots more goat milk than I know what to do with, so I needed a new use! I found this blog post and gave it a shot yesterday. I got out my ingredients and went to work.
I won't post the recipe again, since there are lots of different blog posts on the New England Cheesemaking Supply blog, but I'll just skim over the main steps.
I added the required amount of citric acid to 1 gallon of milk, then heated to 90 degrees.
Then I added the rennet that had been dissolved in water, and let it sit for 5 minutes. After the 5 minutes is up, I checked to make sure the milk had set up. Sure enough, it pulled away from the pot when I pressed it. Yay!
Then I cut the curd. I used a cake icing spatula, which worked perfectly.
After the curd was cut, I heated it all back up to 105 degrees, while gently stirring.
Then, the whey gets drained, and the curd goes into a microwave safe bowl. You can see the bumps on the cheese from my colander.
The cheese gets microwaved for 1 minute, then after the whey is drained off (as often as needed), it gets kneaded like bread. I didn't get pictures of this part because I had my hands in cheese. This is where the process went wrong the last time, but for whatever reason it went perfectly this time. I kneaded until the cheese was shiny, then I stretched it, and then formed it into small balls. Then the balls chilled in icewater for about 15 minutes.
Then I ate it! I sliced up some tomato (not my garden tomatoes yet, darn it), with some basil and mozzarella. Then I drizzled it all with olive oil and sprinkled a little salt and pepper over it. It was delicious! I'm so excited it actually worked for me, and I know I'll be making this much more often!! I bought the rennet tablets from NE Cheesemaking Supply. I think I got 10 tablets, and each tablet will set FOUR gallons of milk, so I've got LOTS of cheese making to do!
I highly suggest you try it. If you can stir, you can make this! And I love NE Cheesemaking Supply...Ricki Carroll's book is also a must-have!
Saturday, October 19, 2013
Chowdah
I found this recipe a couple of weeks ago at work. I was bored and actually reading one of those magazines that comes in the newspaper...the Parade maybe? See, our office has county, state, and federal employees working together in one space. Some of our employees were out on furlough, and even though there were still some of us there working, we were prohibited from using our computers which are on the federal system. I had some free time, so I was reading the paper, and this recipe caught my eye.
It's called Smokey Corn and Shrimp Chowder, by Relish (or by Jill Melton, the website says both). I went home and made it that same night, and it was so good. I highly recommend it. If you don't like spicy things, cut back on the cayenne pepper by at least half...it definitely had a bite. And I used turnip greens, but any greens will do.
Smoky Corn and Shrimp Chowder
Ingredients:
4 ears fresh sweet corn
4 bacon slices
1 medium white onion, chopped
1 teaspoon salt
1 teaspoon smoked paprika
1/4 teaspoon cayenne pepper
2 tablespoons flour
2 medium baking potatoes, chopped
5 cups 2-percent reduced-fat milk
1 pound shrimp, peeled (deveined, if large)
4 cups baby arugula or other peppery greens, such as mache or chopped and stemmed mustard or turnip greens
1. Cut corn kernels from cob. Scrape cobs with back of knife to release milk. Set aside.
2. Cook bacon in large Dutch oven. Remove from pan, drain and crumble.
3. Add onions, corn, smoked paprika and cayenne pepper to bacon
drippings. Saute 10 minutes. Add flour, whisking well and cook 2
minutes. Add potatoes and milk. Cook 10 minutes or until thick and
creamy. Add shrimp and cook until pink. Stir in arugula. Serve with
crumbled bacon.
Sunday, October 13, 2013
Messy Kitchen
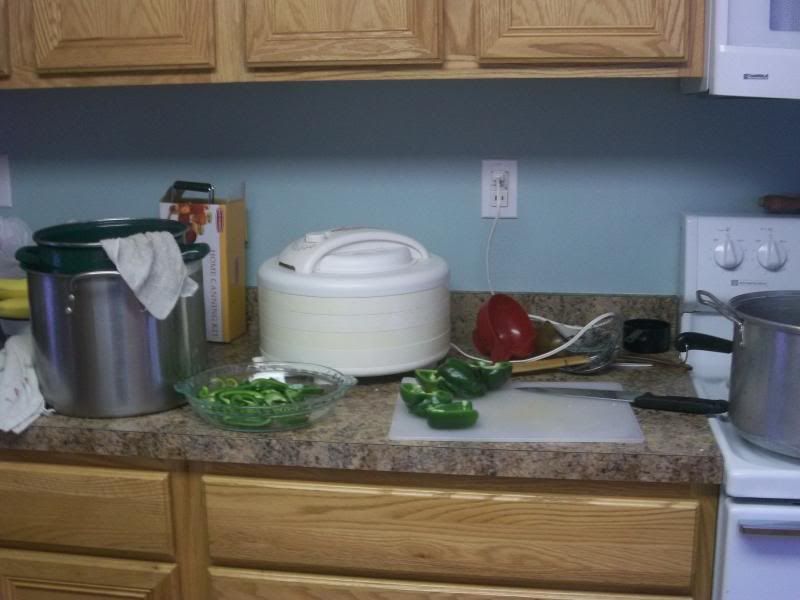
It's food processing time around here, which makes for a very messy kitchen. This weekend I'm working on canning and drying potatoes, cutting up and freezing peppers, and processing apples (dried, applesauce, and apple butter). I also have a half bushel of tomatoes waiting for me to do something with them, but I realized this weekend I despise processing tomatoes. I don't know if it's because there are too many steps (like blanching, peeling, chopping, etc), or if it's because we don't really eat that many tomatoes unless we're having it as sauce, but I think I'm going to save a few for sandwiches and give the rest to the chickens. Life is too short to be held hostage by tomatoes.
We were given a good amount of bell peppers, so I sliced some and diced some to freeze. The sliced ones will be great in fajitas, and I froze them individually on trays so we can just pick out the amount we need.
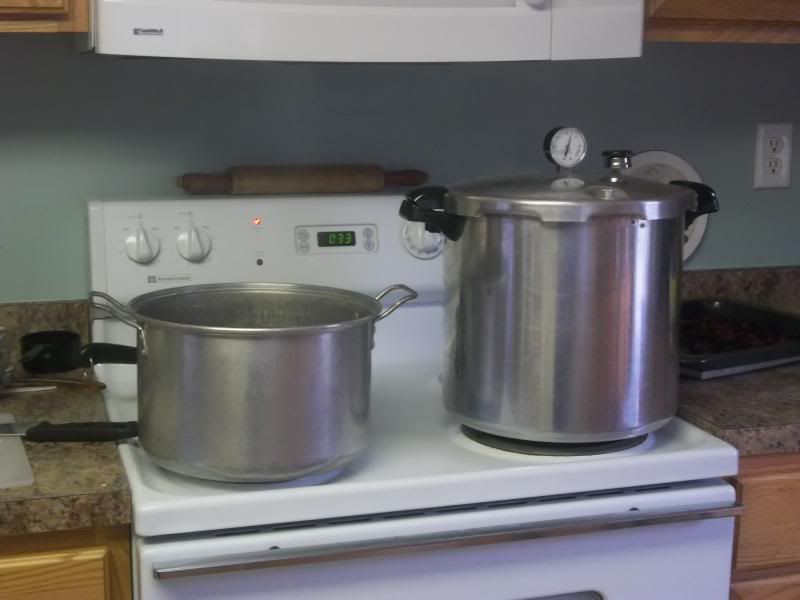
I had the pressure canner going with a second load of potatoes yesterday. This is my first year canning potatoes. I bought about 40 lbs of organic potatoes from my friend who owns an organic vegetable farm. I chopped them and canned them, and we used a jar of them the other night in soup. It was nice being able to just open the jar and add them to the soup, which saved a lot of time. I'm also drying some chopped potatoes (which we can add to soup as well), and some sliced potatoes (for things like au gratin potatoes).
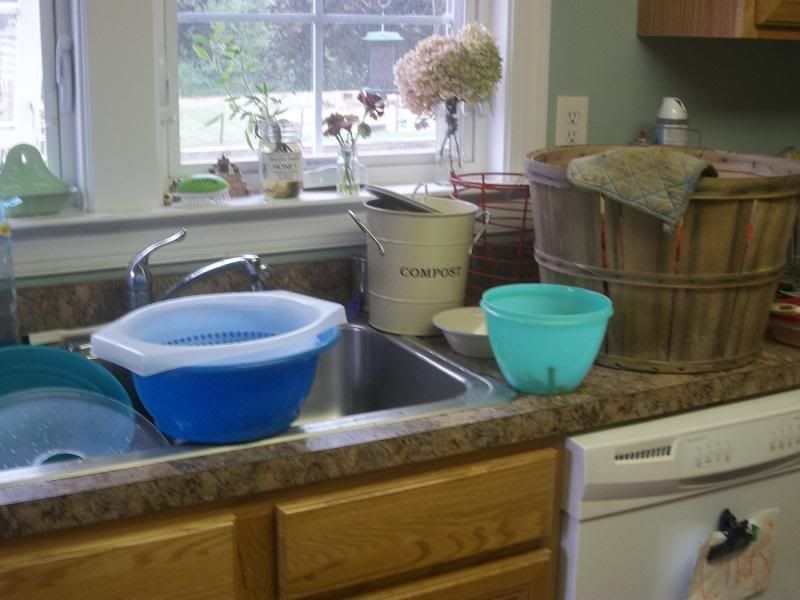
This is the mess near the sink. Lots of bowls everywhere, and the compost bucket is full.
Today I'll get started on the apples, since we went to the orchard yesterday. Hopefully the dehydrator will be finished with the potatoes soon, so I can put in a load of apple slices.
Wednesday, March 20, 2013
Bacon Potato Hash and Baked Zucchini Spears
If you're looking for a quick dinner, try this bacon, potato, and corn hash. It's delicious and easy to make.
The recipe is easy. Here's what you need:
bacon
potatoes
corn (frozen or fresh, canned corn is the devil)
seasonings
1. Cut the bacon into big pieces, and start cooking it in a skillet (we like cast iron). When the bacon starts rendering fat out, add the potato (cut into pieces). Let the potatoes get nice and golden brown on all sides.
2. Season to taste. We like salt, pepper, and rosemary.
3. When the potatoes are just about done, add the corn and cook for a few more minutes until the corn is heated through.
The bacon should give off enough fat to cook the potatoes, but if you use a lot of potatoes you can add more fat to the pan. We like lard the best, and potatoes roasted in lard are so delicious. You can also use butter, or oil if you must. There aren't any quantities in my recipe, because you can use as much or as little of each thing as you want. We usually cook a pound of bacon, about 6-8 large potatoes, and a good bit of corn.
As a side dish tonight, I made these zucchini spears I found on Pinterest.
They're incredibly easy too. You'll need:
zucchini (imagine that)
parmesan cheese
an egg
seasonings
In a small bowl, make an egg wash by scrambling one egg with a little water (maybe a Tbsp or two). In a separate small bowl, mix parmesan cheese with salt, pepper, and whatever other spices you want (I added a bit of garlic powder). Cut zucchini into spear shapes. Dip zucchini in egg wash, roll in cheese mix, and put on lightly greased cookie sheet. Bake at 375 until cheese is golden brown. Again, quantities depend on how much you want to make. You can't get easier than that!
Friday, January 4, 2013
Squashed Pumpkin Soup
Warning, crappy pictures in this post. I was too lazy to get good pictures (or at least try to get good pics) because I wanted to stop procrastinating and just blog already.
Just before Halloween a farmer I know from work gave me a couple of pumpkins he grew. He said they were called "peanut pumpkins" and were hard to find, and he grew them every year and gave them away to friends. I offered to buy a couple, but he said I could have them. They were interesting, and I thought I'd save some seeds and grow them next year. He said they were good for pies, so I also wanted to cook them down for puree.
Last week I was looking through my Baker Creek 2013 seed catalog, dreaming about the garden. You've got to get one of their catalogs...just amazing. So I was looking through the catalog and found the peanut pumpkin! Turns out it's called Galeux D'Eysines, and it's a type of squash. I read it is used in France for soups, so I decided to make a soup out of one of mine.
So I cut it in half, removed the seeds, and baked it in the oven until it was tender. Then I scooped out the flesh and put it in a pot with some sauteed onion, salt, and pepper. I heated everything together, then pureed it in the food processor. Then I returned it to the pot and added cream and come curry powder. It's delicious!
David isn't a fan of it (he said the texture was like baby food), but I love it. It's just how I imagined a good pumpkin soup would taste.
Oh, and the seeds are drying so I can grow my own this year! I have plenty of seeds, so if anyone would like me to send you a few, just let me know in the comments and I'll get in touch with you!
Sunday, September 23, 2012
Slow Sundays
I love lazy Sundays like this. We had a great day...some productivity but lots of laying around. Elmer and Buford got baths this morning so we had a little photoshoot. Elmer wasn't paying attention.
I put a little flower hair clip in Buford's shaggy hair. He left it there for about an hour. I really need to give him a clip because his shaggy coat tends to collect things.
Even the boys like to relax on the couch on Sundays.
Elmer and David love to snuggle on the couch. It's rare that David lays on the couch without Elmer right next to him (or in most cases, right on him).
And while the boys relaxed on teh couch I finally canned up the batch of tomato sauce I've been working on. I got 7 quarts canned, and froze 2 quarts (since I didn't want to have to put a load of only 2 cans in the canner).
I think I'll spend the rest of the evening working on my Foxtail sweater. The windows are open and the cool breeze is blowing in and it's a perfect time to sit on the couch and knit!
Monday, September 3, 2012
Laboring on Labor Day Weekend
I took advantage of the long weekend and did some food preservation. I've really been wanting to pressure can some soups for some ready-to-go meals, and I finally got around to it. I decided to use the last of our BBQed pork (more on that later) and made a pork and bean soup. I ended up with 2 quarts and 6 pints (one didn't fit in the canner, so it's in the fridge) of soup, which will be great for quick meals.

David and I also bought a bushel of peaches, so I needed to use those up. I canned some peach halves (8 quarts) and made a really great peach topping with cinnamon and sugar and nutmeg (3 half pints and 1 pint). I also dehydrated lots of them, and froze several gallon bag fulls.
This is where we keep our home canned goods, in the cellar part of the basement. The shelves are filling up. I really love to see canned things, because they just look so pretty. The top shelf has 1 quart of applesauce, a couple quarts of stock, several quarts of pigeon peas, a couple quarts of venison, and several smaller jars of tomato juice. The second shelf down has a couple half-pints of peach jam, 2 quarts of pickles, a couple pints of pickle relish, several smaller jars of jalepeno jelly, a couple jars of pickled jalepenos, some apple butter, cherry marmalade, peach topping, and halved peaches. The next shelf down has the soup I just made. Oh yeah, and paint, but we won't eat that. ;-)
I'd like to can up some more soups and stock, so they're ready to go when we're feeling lazy or in a hurry and need a quick meal.
Wednesday, November 16, 2011
Stock Sunday
Sunday I made stock. The pot on the left is poultry stock (chicken and turkey) and the pot on the right is lamb stock. I roasted the lamb bones first and boy, the house smelled so good! I let it simmer on low overnight and Monday morning I canned 7 quarts before I went in to work (a few hours late). I would have canned another batch, but I ran out of time so some went for that night's dinner, some went into the freezer, and some is in the fridge for tomorrow's (or Friday's) dinner.
Sunday, January 30, 2011
Homemade Cake Donuts
Ingredients
- 2.5-3 cups all-purpose flour
- 1/2 cup white sugar
- 1 teaspoon salt
- 1 tablespoon baking powder
- 1/2 teaspoon ground cinnamon
- 1/4 teaspoon ground nutmeg
- 2 tablespoons melted butter
- 1/2 cup milk
- 1 egg, beaten
Sift together 2.5 cups of flour, sugar, salt, baking powder, cinnamon, and nutmeg. Add in the melted butter and mix until crumbly. Stir in milk and egg until smooth. Add remaining flour if needed until dough is slightly sticky but able to be kneaded. Knead lightly on well floured surface. Roll out dough to 1/2" thick. Use donut cutter or 2 biscuit cutters to cut into donut shape. Fry in 375* oil, flipping once, until golden brown. Drain on paper towels. Serve plain, or roll in cinnamon-sugar or powdered sugar.
These donuts were very easy to make! I ended up making twisted donuts and donut holes along with the regular round shaped donuts.
Tuesday, January 25, 2011
Hot Tamales!
Last night I made tamales for the first time. I had high hopes for them, and luckily I wasn't disappointed! I am not Hispanic, but sometimes I really wish I was because I love Mexican food and I'd love to be a whiz at cooking it.
So, in order to find a recipe, I did what any person would do. I looked it up on Youtube! I found this nice video explaining how to make the tamales. It really got me in the mood with those crazy skeletons and peppy music! :-) Of course I tweaked their recipe in order to use what I already had in the pantry.
I'll show how I made them, then post the recipe below. I got all the ingredients together and set up a little assembly line.

First, the masa dough gets spread on the soaked corn husk. In the Youtube video, the sisters do an awesome job spreading the dough perfectly with the backs of spoons. I found it was easier for me to dip my fingertips in water, then push the dough into place like Play-Doh.

Then I put the filling inside.

Wrapped the sides...

Folded the bottom up...

And put them in the steamer pot.

Then I did it again until I ran out of ingredients!

Then I steamed them for an hour and ten minutes.

I served them with a little sour cream and a sauce I made. The sauce was simply a can of diced tomatoes, half an onion, salt, a splash of lime juice, cilantro, and garlic and onion powder to taste. Sort-of like a very smooth salsa, only cooked.

I brought leftovers to eat at work today and they were even better since they really got a chance to firm up. I'm definitely going to make these again!
Here are the details:
Masa Dough:
2 c Masa Harina
2/3 cup lard
1/2 tsp salt
garlic powder to taste
onion powder to taste
~1 1/4 c beef broth (I used the broth from my jar of venison)
Whip lard until smooth, then add the masa and seasonings. Slowly add the broth until the right consistency is reached. I'm not exactly sure what the perfect consistency is, but you should know. It'll just feel right. Soft, but not runny, and able to be spread. You may want slightly more broth. Let the dough sit for about 20 minutes to absorb and soften.
Filling: (here's what I used, you can tweak it to your liking)
1 jar of canned venison (probably 2 lbs of meat before cooking)
1 can of Rotel (tomatoes with chiles)
1 onion
1 clove garlic
cilantro
Put Rotel, garlic, onion, and cilantro in blender or food processor and blend until smooth. Put meat in a pot on the stove (medium heat) and add blended mixture. Stir and cook until heated through. If you don't have canned meat or don't want to use it, just do some method of cooking the meat low and slow so it's nice and tender, like in a crock pot.
The nice thing about this recipe is it can be tweaked depending on personal preferences. But I'm not pretending to be an expert...because like I said, this was the first time I've made them. :-)
Adios!
So, in order to find a recipe, I did what any person would do. I looked it up on Youtube! I found this nice video explaining how to make the tamales. It really got me in the mood with those crazy skeletons and peppy music! :-) Of course I tweaked their recipe in order to use what I already had in the pantry.
I'll show how I made them, then post the recipe below. I got all the ingredients together and set up a little assembly line.
First, the masa dough gets spread on the soaked corn husk. In the Youtube video, the sisters do an awesome job spreading the dough perfectly with the backs of spoons. I found it was easier for me to dip my fingertips in water, then push the dough into place like Play-Doh.
Then I put the filling inside.
Wrapped the sides...
Folded the bottom up...
And put them in the steamer pot.
Then I did it again until I ran out of ingredients!
Then I steamed them for an hour and ten minutes.
I served them with a little sour cream and a sauce I made. The sauce was simply a can of diced tomatoes, half an onion, salt, a splash of lime juice, cilantro, and garlic and onion powder to taste. Sort-of like a very smooth salsa, only cooked.
I brought leftovers to eat at work today and they were even better since they really got a chance to firm up. I'm definitely going to make these again!
Here are the details:
Masa Dough:
2 c Masa Harina
2/3 cup lard
1/2 tsp salt
garlic powder to taste
onion powder to taste
~1 1/4 c beef broth (I used the broth from my jar of venison)
Whip lard until smooth, then add the masa and seasonings. Slowly add the broth until the right consistency is reached. I'm not exactly sure what the perfect consistency is, but you should know. It'll just feel right. Soft, but not runny, and able to be spread. You may want slightly more broth. Let the dough sit for about 20 minutes to absorb and soften.
Filling: (here's what I used, you can tweak it to your liking)
1 jar of canned venison (probably 2 lbs of meat before cooking)
1 can of Rotel (tomatoes with chiles)
1 onion
1 clove garlic
cilantro
Put Rotel, garlic, onion, and cilantro in blender or food processor and blend until smooth. Put meat in a pot on the stove (medium heat) and add blended mixture. Stir and cook until heated through. If you don't have canned meat or don't want to use it, just do some method of cooking the meat low and slow so it's nice and tender, like in a crock pot.
The nice thing about this recipe is it can be tweaked depending on personal preferences. But I'm not pretending to be an expert...because like I said, this was the first time I've made them. :-)
Adios!
Subscribe to:
Posts (Atom)