Showing posts with label spinning. Show all posts

Monday, April 18, 2016

Woolly Stuff

I've knitted a few fun things lately and wanted to show them. First up is Oink, by Susan B. Anderson.  It's the cutest little flying pig!  I love how it turned out.  


A while back I found Susan B. Anderson's reversible patterns.  I knit the little Egg-to-Turtle a few months ago.


This time I made the Mini-Reversible Duck to Bunny.  


They're such fun little patterns and take hardly any time at all to knit up!  You have to like fiddly things though, because some of the pieces can be a bit fiddly.

Remember the roving I dyed with Easter egg dye?  I spun it and it turned out really well, if I do say so myself.  I ended up spinning up the colored roving and some white roving, then plying them together.  Stripes!  I really enjoyed the dyeing part, and I can see a lot of that in my future!


Monday, February 15, 2016

From Hoof to Hank

I finally made yarn from wool from my own sheep, after over 20 years of owning sheep.  Took me long enough, don't you think?  Mostly, I haven't done it because I primarily breed and raise meat breed sheep, and their fleeces aren't ideal for spinning, knitting, and wearing.

I started working on Barley's fleece in August, and I finally finished some yarn recently.  I washed the fleece in the summer, when it could dry outside.  Then I sort of got busy with other projects.

Here's the fleece, right after shearing.


Then it got washed.  My friend Nancy let me use her set up to skirt (remove undesirable and dirty pieces), wash, and dry the fleece.


Here's the fleece on the skirting table.


It took a few washes to get it clean.


When it was dry, I started picking it (opening up the fibers) and carding it.  Nancy showed me how to use her picker.


And then the fiber was carded. Carding it aligns the fibers (mostly) to get a smooth batt of wool.  Then you can spin it.  You can also use something called a diz to take the fiber off the carder as roving (a "rope" of wool) and spin right from the roving.


A pile of batts.


Then I spun and spun and spun.


When I had 2 full bobbins, I plyed the 2 singles together.  One strand (above) is called a single, and when you twist two or more together, that's plying.  I made a 2 ply yarn.  After I plied the yarn, I put it on the niddy-noddy (below) to make the hank of yarn.


The yarn got washed again, to set the twist.


Now that I have yarn, I need to figure out what I'm going to make with it!


I think Barley would approve.  :-)

Tuesday, September 15, 2015

My Louet

Before I got into spinning, I used to hear other spinners talk about how spinning wheels multiplied quickly. You'd start out with one, and before you know it you'd end up with several.  I thought they were crazy. Surely you wouldn't need more than 1 wheel, right?

Well, I now have 3 wheels.  I just posted a picture of the 3 wheels in my workroom post.  My most recent wheel is my Louet s15 that I bought from someone selling it on Craigslist.  I brought my friend Nancy with me to look at it, and we both spun on it and it seemed to work fine. The wheel was slightly warped, but it didn't affect the spinning ability.

I was spinning on it recently, and the part that connected the treadle (foot pedal) to the footman (rod that connects the treadle to the wheel) came detached.  I tried to re-attach it, but realized someone had improvised and replaced that part with a piece of cable (like coax cable).  I figured I could replace the cable with something similar, but softer so the screws to attach it would screw in easier. I was trying to take the workings apart, when I realized someone had also glued some parts together where it connected to the wheel.

Luckily, even though the s15 is a discontinued wheel, replacement parts are still readily available.  I went online and in 5 minutes was able to purchase all of the replacement parts I needed.

Here's the replacement cable they used.  A screw is supposed to go through this part, and the wires prevented that.


Here's the actual replacement part from Louet.  It's solid enough to hold its shape, but soft enough to flex.  It's almost like a hot glue stick (and if this one ever needs replacing, I may try a hot glue stick).

Here it is installed.

 The part that connects the footman to the wheel had to be pried off, since it had been super glued on.


Unfortunately the wheel got slightly scratched when we had to pry the pieces apart, but it's not very noticeable.  That metal bearing below was all crusty and old, so it got replaced too.


Here she is, all put back together.  Well, except for the drive band, which is hanging loose in the picture below.


I've been working on spinning Barley's fleece, and the wheel seems to really like the batts I've carded.  


From fluffy batt to spun singles.  I am loving the color.


Here's a short video I took while spinning the other day.  I was curious to compare my spinning to when I was first learning. I seem smoother now than I was, which is nice.  


Wednesday, September 9, 2015

My Workroom

When our house flooded this past winter after a pipe burst, we were very upset and stressed thinking about all the work we had in order to move stuff out, repair everything, and move everything back in.  Now that we're 99.5% done with everything (still have one small closet to drywall), things are much more positive.  Although it was not exactly the kind of motivation we wanted, it was a great way to get our space more organized.  The basement especially needed some help.

It took several months, but I finally got my space organized as a great work space for me.  It's now organized and has all my yarn, spinning stuff, felting stuff, and Purl & June stuff.  Well, there's still a closet full of all of my oils and soap/lipbalm making supplies upstairs, since all of that is made upstairs.  

But check out my space in the basement.   We've "divided" it into 3 spaces. One area will be a living space, with seating and a TV so we can have it as a sort-of den.  The second space will be for David's firearm and reloading area, and the third space is mine.

Here's mine!  I have just about enough room to store my stuff, but I underestimated how much STUFF I actually have.


This large 4' cabinet holds most of my yarn.


I got the storage bins at Home Depot, and even though they weren't cheap ($7 each adds up!), they are worth it.  I wanted to be able to put everything in nice bins.  My sewing machines are on the bottom, mainly for weight to stabilize the cabinet.   There are extra bins on top, along with fiber fill.


My second cabinet is only 36", because I didn't think I needed 2 of the larger ones.  It's a bit deeper than the 48" one, which is nice.  This cabinet holds my books (too heavy to put on a higher shelf), my fiber for spinning (bins on top shelf), fabric, and bins with sewing supplies and knitting supplies.


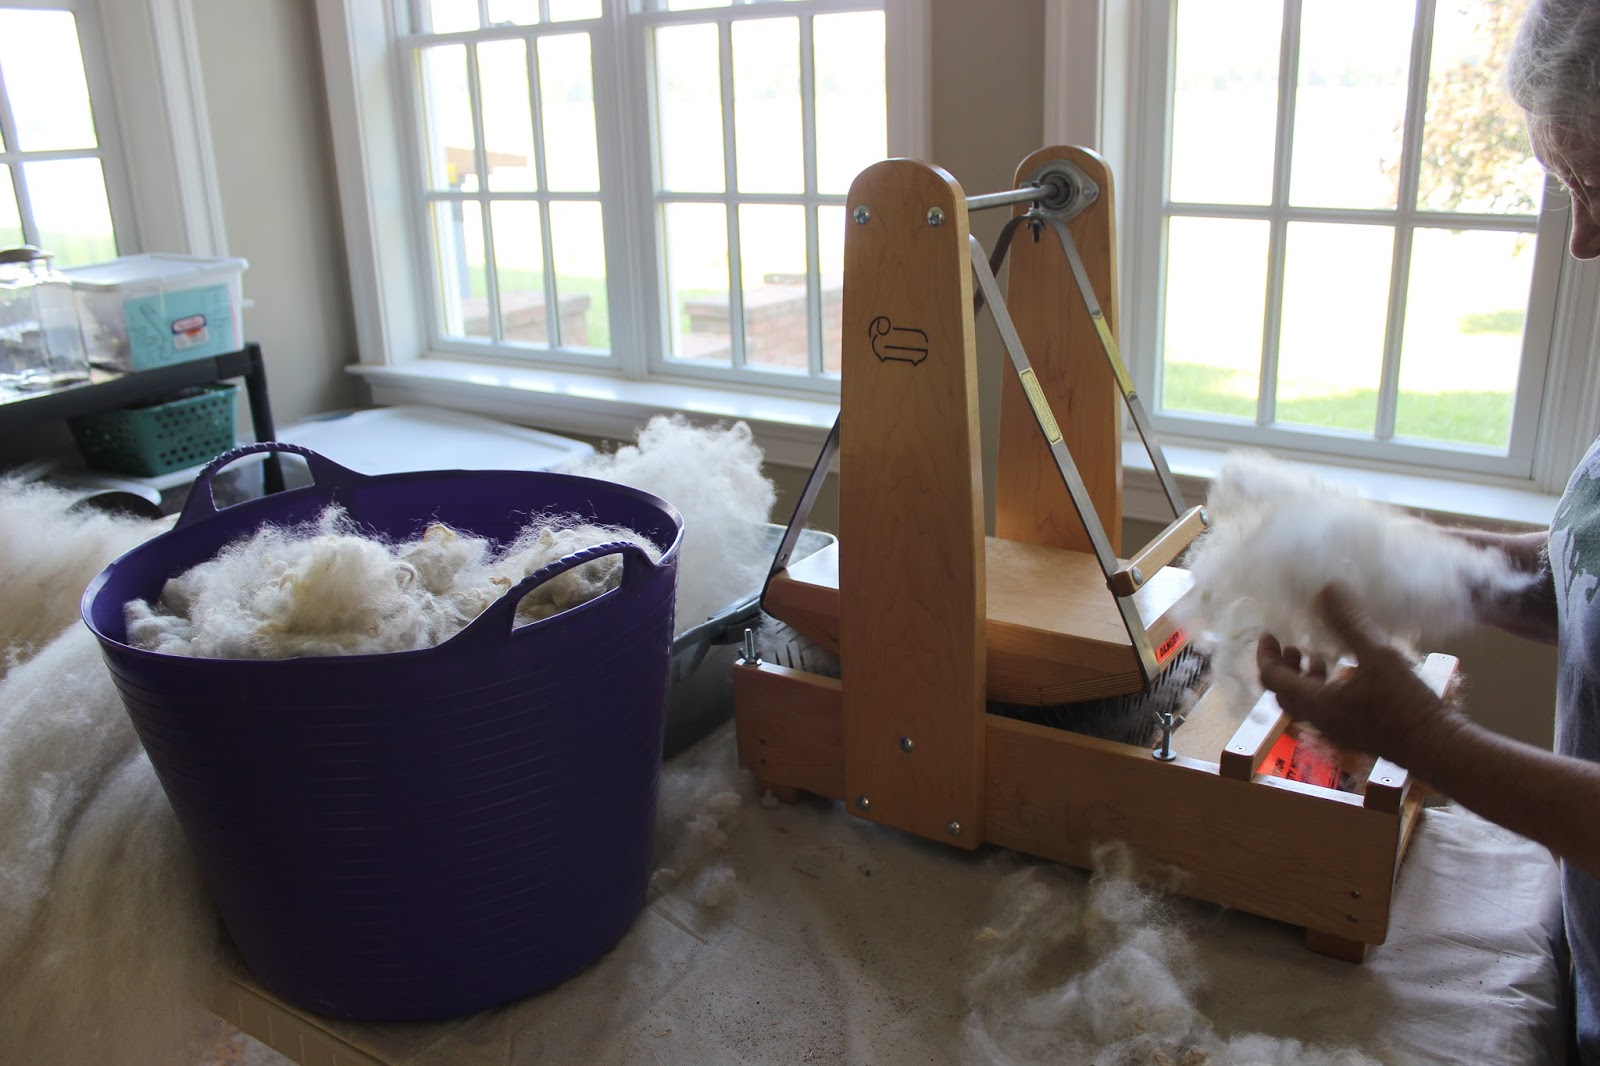
This is my fiber tower. It holds all of my fiber and roving for felting.  And check out my new drum carder on top!  I just got it yesterday.  It's the Brother drum carder with the extra fine cloth.  I will be able to prepare all types of fiber for spinning.


My three spinning wheels sit on the hearth.  The one on the left is the spindle wheel David made me for Christmas.  The one in the middle is my "new" (to me) Louet s15.  I got it last week and it's a very nice workhorse of a wheel.  Then the Ashford Traditional is on the right.


These shelves are great for drying soap, and there's room underneath to add more shelves when needed.  Right now it's great for storing bins.  The bins hold wool sweaters (for felting/fulling), Purl & June supplies, and other things.            


This shelf holds shipping and packing supplies, labeling supplies, extra lye (bottom shelf), and all the paper and labels I need for Purl & June stuff.  My new business printer is on the table on the right of the picture.  It replaced the one that got "rained on" from the flood.
I bought a 4' table that I can fold flat when not in use. It'll be a great work surface.


I am so excited just looking at these pictures!  Never before have I had such an organized space for creating.  I just really hope I can keep it looking this organized!!  

Sunday, May 3, 2015

Aquafire

 I knit my handspun alpaca into an Aquafire so I could wear it to the Maryland Sheep & Wool Festival. I wanted something I could wear around my neck, but I didn't have enough for a cowl (and it's too hot to wear a cowl anyways), and the Aquafire fit the bill perfectly!


Sunday, April 26, 2015

Ready to Knit

 This morning Devin and Kylee helped me wind the alpaca yarn I spun around my makeshift niddy noddy (the back of a chair).  I calculated approximately 120 yards of yarn.  Then I soaked it in water to set the twist, and hung it to dry.

I was so excited after it dried. It is so soft and fluffy!  I love the colors, and can't wait to knit it up into something special.  Thank goodness for Ravelry. I was able to find this Aquafire pattern, and I think it'll be perfect for the yarn.  I'm hoping to have it knitted up before this weekend, because I want to wear it to the Maryland Sheep & Wool Festival.


Saturday, April 18, 2015

My First Navajo Ply

I spun my first najavo plied yarn the other day, and wanted to share pictures.  I found some really lovely alpaca fiber in my stash, and it has such pretty colors I wanted to try to keep them separate.  Navajo plying, or chain plying, is a way to take a single (single strand of yarn) and ply it back on itself to create a 3 ply yarn.  The standard way of plying would put 2 singles (or more) together, and you'd end up with a barber pole effect with the colors.  Navajo plying gives you a 3 ply with gradual color changes.  

I tried separating by color...white, blue, and tan.


I had a little bit of trouble with my singles wanting to kink up on themselves, so there are a few little pigtails like in the picture below.


Now I need to wind it into a hank and wash it, then decide what to knit with it!

A friend sent me this video, by Sarah Anderson.  She has a very calm, gentle way of plying and it her video makes it easy to understand and learn.  I just picked up one of her books at the library, called The Spinner's Book of Yarn Designs, and I think this would be a great one to own.  I've only looked through it briefly, but I can see there are so many great pictures and descriptions.
Related Posts Plugin for WordPress, Blogger...